RESTful API
[ 구현 목표 ]
- RESTful API를 통해 json 형태로 값을 넘겨 CRUD 구현하기
[ 초기 설정 ]
- RESTful API + DB(MyBatis) + JSON(jackson, json-simple)
1. Spring MVC Project -> SpringRestfulTest 생성 > com.test.rest 생성
2. pom xml
	- Lombok 1개, MyBatis 4개, log4j 1개, jackson 3개, json-simple 1개
	- ojdbc6 (직접 설치)
3. web.xml
	- 인코딩 필터(UTF-8)
4. root-context.xml
	- 오라클 DB, log4j 설정
5. servelt-context.xml
	- 설정 X

6. 파일 생성
	- com.test.rest > RestController.java
                        > ColorDAO.java
                        > ColorDTO.java
	- com.test.rest.mapper > rest.xml
[ DB ]
- 자! 여기까지 기본 준비는 끝났다. 이제 어떻게 RESTful API를 직접 눈으로 확인할 지 알아보자.
create table tblColor (
    seq number primary key,         --PK
    name varchar2(100) not null,    --색상명
    rgb varchar2(7) not null,       --RGB(#FFFFFF)
    example varchar2(100) null
);

create sequence seqColor;

-- 예제 확인을 위해 미리 데이터를 넣어둔다.
insert into tblColor (seq, name, rgb, example) values (seqColor.nextVal, 'gold', '#FFD700', '병아리');
insert into tblColor (seq, name, rgb, example) values (seqColor.nextVal, 'tomato', '#FF6347', '토마토');
insert into tblColor (seq, name, rgb, example) values (seqColor.nextVal, 'cornflowerblue', '#6495ED', '포카리');
insert into tblColor (seq, name, rgb, example) values (seqColor.nextVal, 'white', '#FFFFFF', '마스크');
insert into tblColor (seq, name, rgb, example) values (seqColor.nextVal, 'black', '#000000', '선글라스');

commit;
[ RestController.java ]
@Autowird
private ColorDAO dao;
// 전체 목록 보기(R)
// 1. http://localhost:8090/rest/color
// 2. GET
// 3. return JSON
@RequestMapping(value = "/color", method = { RequestMethod.GET })
@ResponseBody
public List<ColorDTO> list(HttpServletRequest req, HttpServletResponse resp, HttpSession session) {
return dao.list();
}
// 단일 요소 보기(R) > 특정 색상 가져오기
// 1. http://localhost:8090/rest/color/:id
// 2. GET
// 3. return JSON
@RequestMapping(value = "/color/{seq}", method = { RequestMethod.GET })
@ResponseBody
public ColorDTO get(@PathVariable("seq") String seq) {
return dao.get(seq);
}
// 요소 추가하기(C)
// 1. http://localhost:8090/rest/color
// 2. POST
// 3. return int
@RequestMapping(value = "/color", method = { RequestMethod.POST })
@ResponseBody
public int add(@RequestBody ColorDTO dto) {
return dao.add(dto);
}
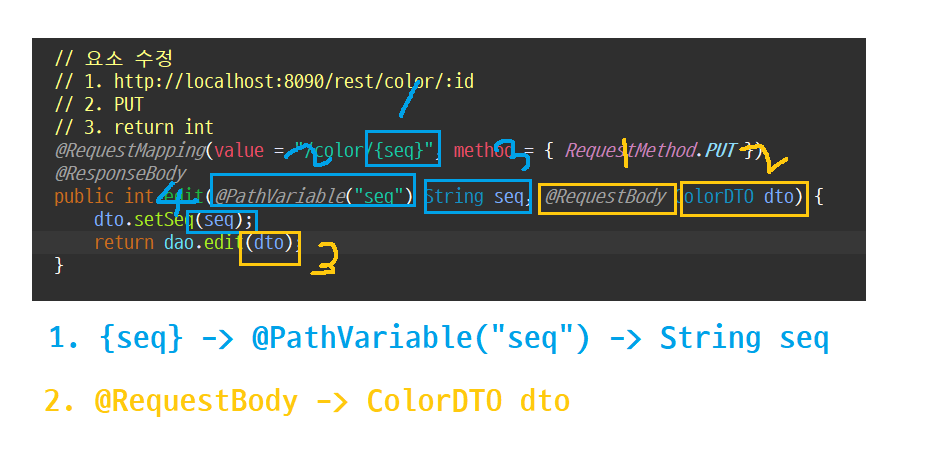
// 요소 수정하기(U)
// 1. http://localhost:8090/rest/color/:id
// 2. PUT
// 3. return int
@RequestMapping(value = "/color/{seq}", method = { RequestMethod.PUT })
@ResponseBody
public int edit(@PathVariable("seq") String seq, @RequestBody ColorDTO dto) {
dto.setSeq(seq);
return dao.edit(dto);
}
// 요소 삭제하기(D)
// 1. http://localhost:8090/rest/color/:id
// 2. DELETE
// 3. return int
@RequestMapping(value = "/color/{seq}", method = { RequestMethod.DELETE })
@ResponseBody
public int del(@PathVariable("seq") String seq) {
return dao.del(seq);
}
- 위 컨트롤러에서 쓰이는 @PathVariable, @RequestBody 어노테이션 의미는 이렇다.
- @ResponseBody, @RequestBody : 각각 HTTP 요청 몸체를 자바 객체로 변환하고 자바객체를 HTTP 응답 몸체로 변환하는데 사용된다.
- @PathVariable: URI 경로에 변수(seq)를 넣어주는 것
[ ColorDTO.java ]
- tblColor 테이블의 컬럼(seq, name, rgb, example) getter & setter
[ ColorDAO.java ]
@Repository
public class ColorDAO {

	@Autowired
	private SqlSessionTemplate template;

	public List<ColorDTO> list() {
		return template.selectList("rest.list");
	}

	public ColorDTO get(String seq) {
		return template.selectOne("rest.get", seq);
	}

	public int add(ColorDTO dto) {
		return template.insert("rest.add", dto);
	}

	public int edit(ColorDTO dto) {
		return template.update("rest.edit", dto);
	}

	public int del(String seq) {
		return template.delete("rest.del", seq);
	}

}
[ rest.xml ]
- 쿼리 작성
<mapper namespace="rest">

	<select id="list" resultType="com.test.rest.ColorDTO">
		select * from tblColor order by seq asc
	</select>

	<select id="get" parameterType="String" resultType="com.test.rest.ColorDTO">
		select * from tblColor where seq = #{seq}
	</select>

	<insert id="add" parameterType="com.test.rest.ColorDTO">
		insert into tblColor (seq, name, rgb, example)
			values (seqColor.nextVal, #{name}, #{rgb}, #{example})
	</insert>

	<update id="edit" parameterType="com.test.rest.ColorDTO">
		update tblColor set
			name = #{name},
			rgb = #{rgb},
			example = #{example}
		where seq = #{seq}
	</update>

	<delete id="del" parameterType="String">
		delete from tblColor where seq = #{seq}
	</delete>

</mapper>
[ insomnia를 통해 json형식의 데이터 확인하기 ]
1) insomnia를 실행한다.
2) New Request(Ctrl+N)을 눌러 구현한 각 CRUD를 메소드를 지정해 만든다.
3) 확인하기
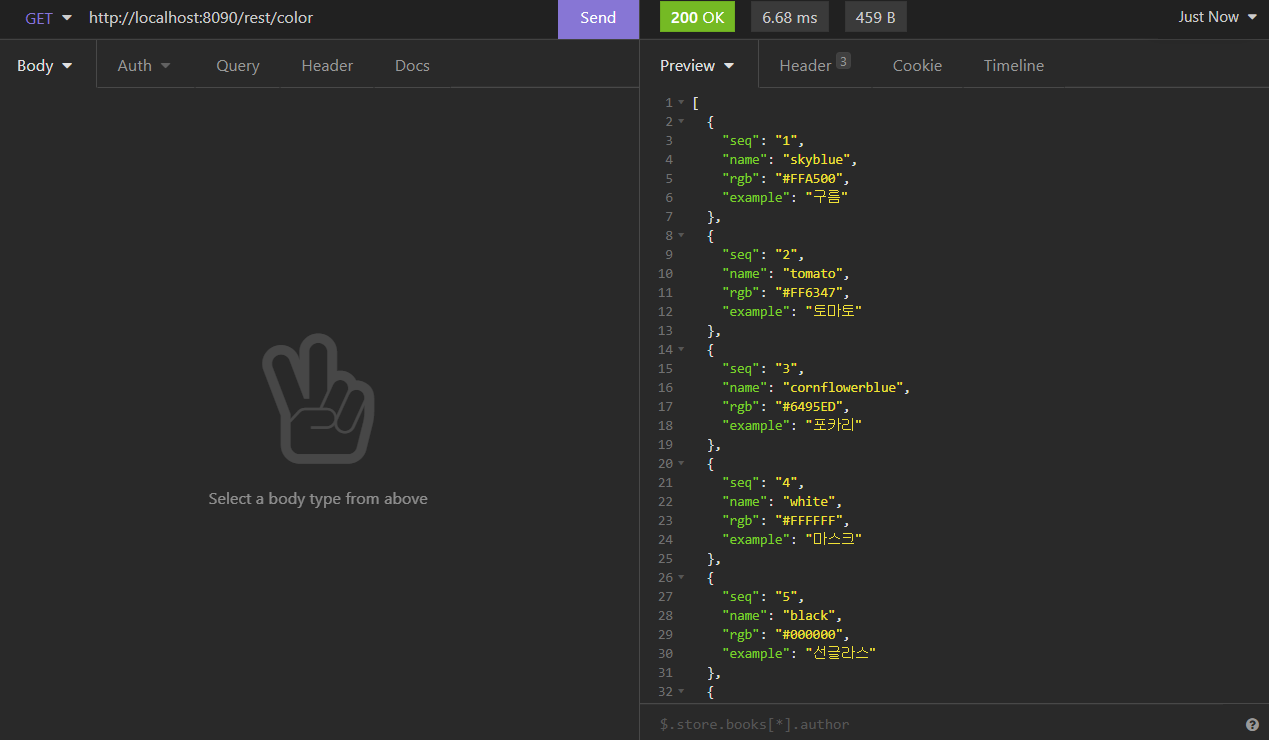
[ 전체 목록 보기 ]
- 메소드를 GET으로 지정하고 URL 주소에 지정해둔 /rest/color를 입력한 뒤 Send 버튼을 클릭한다.
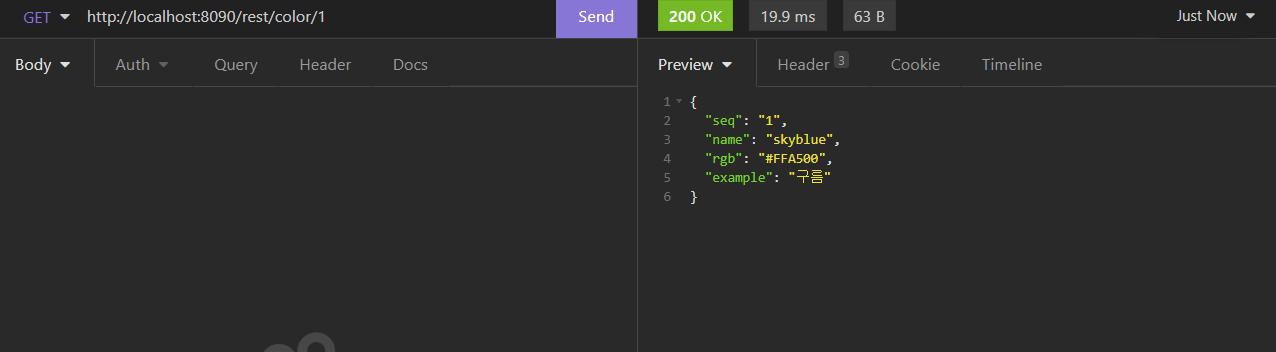
[ 특정(단일) 목록 보기 ]
- 메소드를 GET으로 지정하고 URL 주소에 원하는 /rest/color/seq 를 입력한 뒤 Send 버튼을 클릭한다.
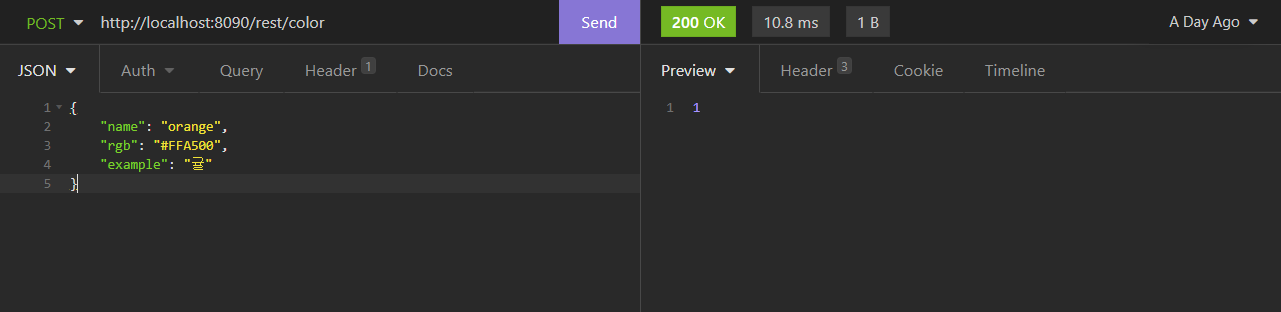
[ 항목 추가하기 ]
- 메소드를 POST로 지정하고 URL 주소에 /rest/color 를 입력한 뒤 아래에 JSON형식으로 선택하고 json 형태의 원하는 값을 입력한 뒤 Send 버튼을 클릭한다.
- 1 또는 0 반환으로 1은 성공을 의미하며 0은 실패를 의미한다.
- 확인을 위해 미리 만들어 두었던 전체 목록 보기에서 Send를 해서 값을 확인하면 데이터가 추가된 것을 볼 수 있다.
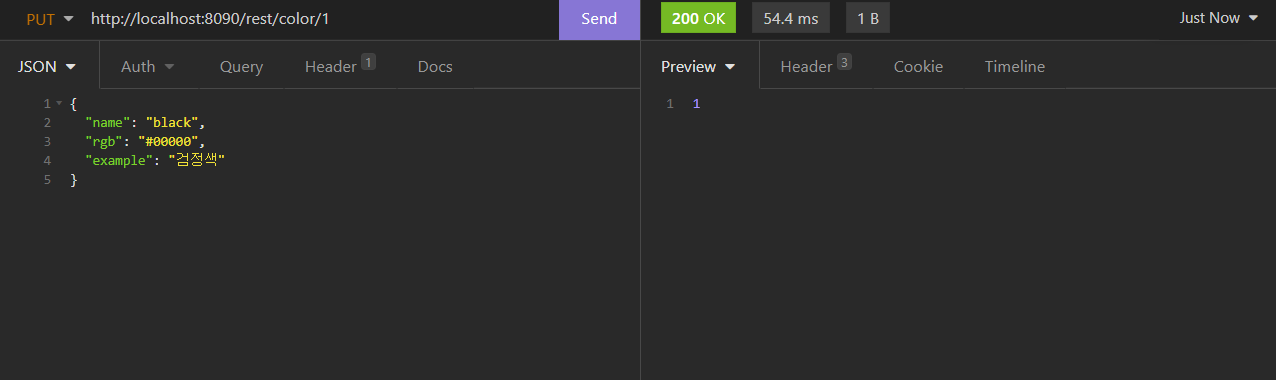
[ 항목 수정하기 ]
- 메소드를 PUT으로 지정하고 URL 주소에 수정할 /rest/color/seq 를 입력한 뒤 아래에 JSON형식으로 선택하고 json 형태의 원하는 값을 입력한 뒤 Send 버튼을 클릭한다.
- 1 또는 0 반환으로 1은 성공을 의미하며 0은 실패를 의미한다.
- 확인을 위해 미리 만들어 두었던 전체 목록 보기에서 Send를 해서 값을 확인하면 해당 데이터가 수정된 것을 볼 수 있다.
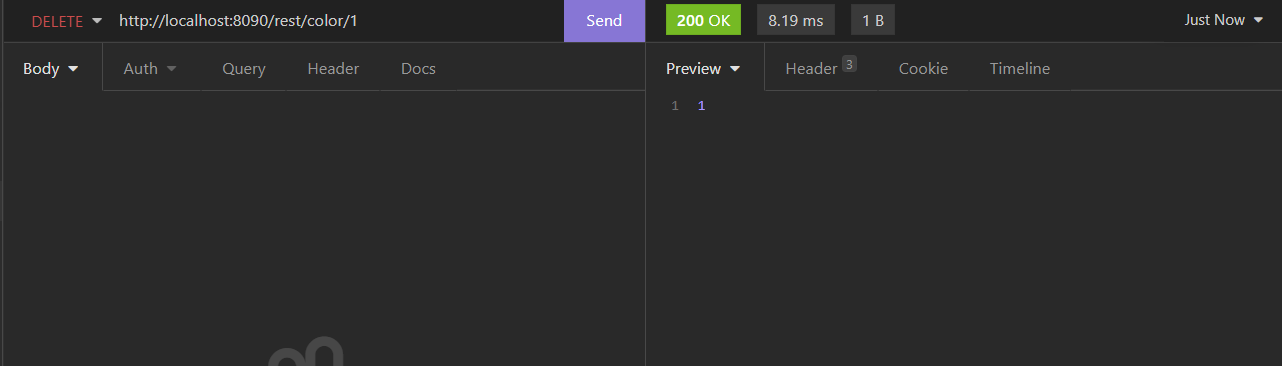
[ 항목 삭제하기 ]
- 메소드를 DELETE으로 지정하고 URL 주소에 삭제할 /rest/color/seq 를 입력한 뒤 Send 버튼을 클릭한다.
- 1 또는 0 반환으로 1은 성공을 의미하며 0은 실패를 의미한다.
- 확인을 위해 미리 만들어 두었던 전체 목록 보기에서 Send를 해서 값을 확인하면 해당 데이터가 삭제된 것을 볼 수 있다.
MEMO>
# RESTful API는 메소드와 URI가 가장 핵심이다!
# API 테스트 도구로 insomnia, postman, vsc 3가지 방법을 써봤는데 개발할 때 굉장히 편할것 같다. (각 프로그램 쓰임새는 앞으로 더 적응해야함)
# 웹 개발은 데이터를 주고 받는 흐름을 먼저 아는것이 중요하다.(선생님 말씀)
'교육 > Spring' 카테고리의 다른 글
| Spring 개발자 수업 111일차 - RESTful API Client 구현 (0) | 2021.09.03 |
|---|---|
| Spring 개발자 수업 110일차(1) - RESTful API (0) | 2021.09.02 |
| Spring 개발자 수업 109일차 - jQuery Ajax를 이용한 post-it 메모장 만들기(작성, 위치 저장, 삭제) (0) | 2021.08.31 |
| Spring 개발자 수업 108일차 - jQuery Ajax를 이용한 post-it 메모장 만들기(생성, 확인) (0) | 2021.08.30 |
| Spring 개발자 수업 107일차 - 휴강 (0) | 2021.08.28 |


댓글